Here is a video that Kayleigh complied to document our piece:
Sunday, May 19, 2013
Wednesday, May 15, 2013
Video of Our Final Project
Here is a video of the whole thing working:
Some up close shots:
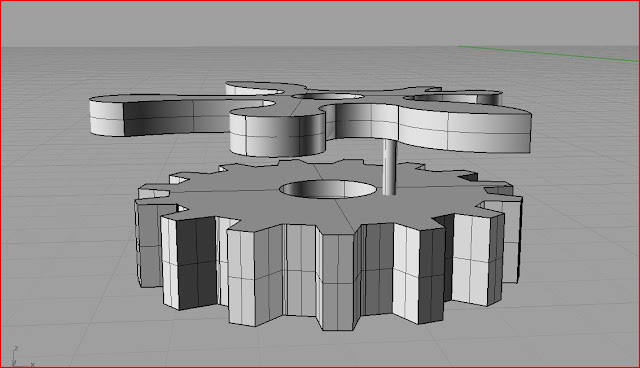
A little look "under the hood":
Some up close shots:
A little look "under the hood":
Mounted on the Wall for Arts + Tech Night!
Here is the final product hung on the wall:

Some more up close glamour shots in the dark:


Here is the plaque we came up with half an hour before the show. We liked it because you can't read it very well, and have to get at the right angle to be able to read what it says. This was the original intention of our piece.

Sunday, May 12, 2013
More Assembly
Here are the servos mounted using those printed brackets and powering the black gear train:
The second gear train was not so easy. For some reason the gears were not in sync and there was too much resistance for the servos to be able to turn them. After some troubleshooting we ended up removing one of the black gears, so there are two gears on the front side which simply don't turn.


Mounting it in our frame:
We stained some lovely pine wood to give a nice frame to our project.
Back

Front

The LED strips are mounted around the top and sides of the box.
We also designed a backplate with a box for our electronics to contain all our components:

Thursday, May 9, 2013
Wednesday, May 8, 2013
Brackets Being 3D Printed
Here is one of our brackets being printed. They are designed to hold a servo to the back of the piece.
Monday, May 6, 2013
Mounting Gears n Such
Here we are mounting the gears:


Friday, May 3, 2013
Lighting
So we were trying to decide how to light the project. It is kinda hard to decide how to do it without seeing everything fully assembled. this is what we tried first. We wired a bunch of LEDs to strips that will sit in a frame around the outside edge of the piece.

.jpg)

.jpg)
Here is a video when we did a little test run with this method:
Thursday, May 2, 2013
Here is the shield we designed that excluded the rotary encoders. We also had to plan for our RGB LED strips that we decided to use instead of the myriad of LEDs we were using before:
Here is the computer design:

We laser cut the protective coating off of this copper coated circuit board stuff:


Then we put it in the acid bath to remove the copper between the traces:

final product:

with everything soldered to it:


Wednesday, May 1, 2013
Arduino Shield Fabrication
Here is the first shield that we made. We ended up having to scrap it and make another because we were originally planning on using full rotation servos and rotary encoders to track the position of the gear train, but we ended up having to go to regular servos.


Tuesday, April 30, 2013
Milled Background Image and Gear Image
We finished milling the backplate.


And here is the image that the gears will be cut from. This will overlay the background image:

Here are the gears after they have been laser cut from the tree image:

Final Image
Here is the final image:


This will be milled on the backplate:

This will be milled onto plexi-glass and the gears will be cut out of it:

How the gears will be cut:

The secondary backplate that has the part of the image not contained by the gears:

Monday, April 29, 2013
Troubles with Imaginary Gears
So the issues we had with the gears was not only a matter of spacing, but also a matter of the program not being precise enough. While imaginary gears are possible to make, the ones that we were using from Gearotic do not actually work when cut from plexi-glass. So in order to still use the organic gears we decided to tether them to working gears behind them.


In order to allow the secondary tether to move, a track needs to be cut. This means that we cannot use full rotation servos, as they will not be able to complete a full turn.


Friday, April 26, 2013
Tuesday, April 23, 2013
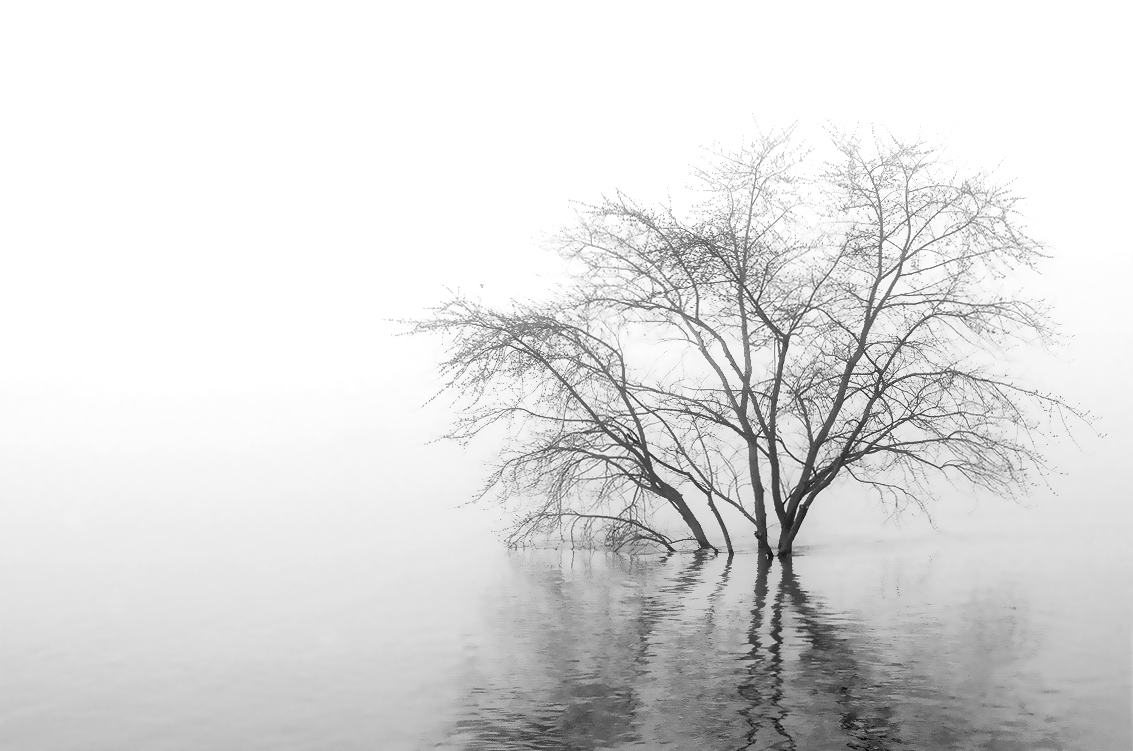
The Evolution of the Image
After the last attempt we did with milling we noticed that the image of the city wasn't super apparent what the image was at first. The milled effect drew people in more than the specific image. So we were exploring other possibilities with images that could be more ambiguous, like sky, water or trees. Here are some of the images I looked at for research:
.jpg)


As I was researching and looking at these images I was thinking that it would be nice to have something hidden in the trees, like and image:

I pulled some inspiration from this image:

....and started painting:
 This is in progress, eventually there will be more trees and I will warp and align the branches to reveal some sort of image.
This will be really cool because even when the gears are not aligned people will be able to tell that they are trees, but until they align the secondary image will be hidden.
.jpg)


I pulled some inspiration from this image:

....and started painting:

This will be really cool because even when the gears are not aligned people will be able to tell that they are trees, but until they align the secondary image will be hidden.
Subscribe to:
Posts (Atom)